Design Ideas For Pittosporums
Pittosporums owe their popularity to not just their great aesthetics, but also to their versatility and ability to cope where other plants would struggle. Some common uses and popular varieties include:
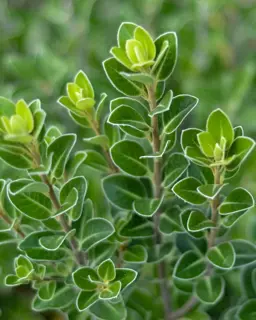
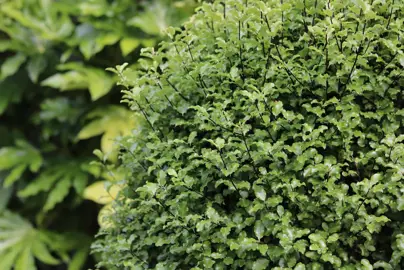
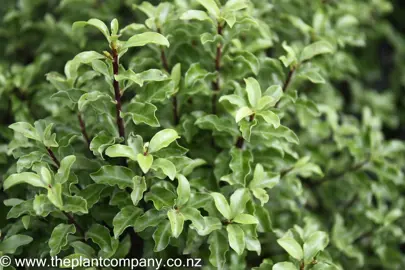
Pittosporum is a popular evergreen shrub native to New Zealand and surrounding regions, prized for its glossy leaves and dense growth. This guide covers essential care tips, planting advice, and maintenance techniques to help your pittosporum thrive in NZ gardens.
These short articles provide some insight into how you might use Pittosporums in different situations and what you might pair them with.
Pittosporums owe their popularity to not just their great aesthetics, but also to their versatility and ability to cope where other plants would struggle. Some common uses and popular varieties include:
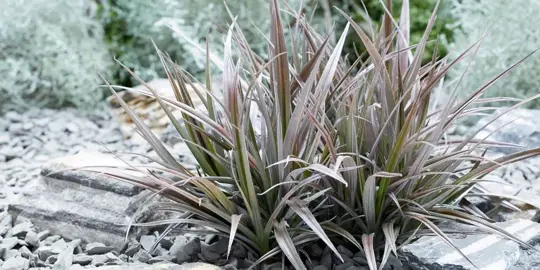
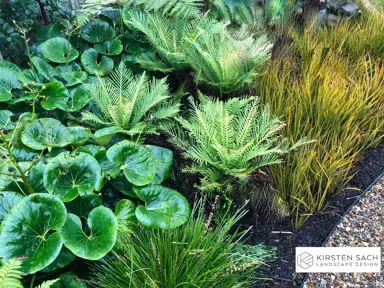
A wide range of plants can be grown with Pittosporums. The Plant Company often recommends using other plant colours and textures to add variety and interest. Such plants include Lomandra, Astelia, Phormium, Westringia, Libertia, Dianella, and Coprosmas. When they are grown in pots, The Plant Company will often have Dichondra Silver Falls trailing from the sides.
Planting Pittosporums and getting them to grow well is generally easy when you get a few of the basics right. This involves planting them in the right soil type, choosing the most ideal planting position, selecting the best variety, and ensuring the plants have the essentials to thrive. The Plant Company has the right advice to ensure success no matter how you are using the Pittosporums.
Pittosporums can cope with moderate to heavy frosts once established, though very young plants should be protected until they are at least 15 cm tall. Frost Cloth is a good option for protecting vulnerable plants if you are worried. Be careful to harden off recently purchased plants if you intend to plant these during winter and frosts are likely. Do this by gradually exposing them to the cooler conditions over a 2-3 week period or until such time as you think that a frost won’t damage them. The Plant Company recommends holding off planting until spring if you are at all worried that new plants might get frosted. Generally speaking, a good-sized Pittosporum planted in spring will cope with frosts the following winter.
Pittosporums are very easy to grow, but you need to have the basics right. Choose a sunny spot and prepare the soil by adding compost or sheep pellets. Feeding your plants in spring with Native Plant Fertiliser will replenish nutrients and keep them fed for 12 months. They should also be watered regularly during dry periods to keep them flourishing.
The most essential item for growing a Pittosporum is good drainage. On poorly drained sites or with gross over-watering they will often succumb to root rot. The Plant Company wants you to have great success, and to that end we have produced a suite of articles that covers everything you need to know about growing Pittosporums.

Pittosporums will grow well in coastal areas provided they are not continuously covered in salt spray. Being constantly coated with sea spray results in leaf burning and ultimate death of the plant. Planting on the opposite side of the house to the beach is generally fine. If the soil is near pure sand, this will become problematic both from a watering and nutritional perspective. Our articles, How To Water Pittosporums and Best Fertiliser For Pittosporums, provide useful advice on these subjects.
If the soil is too saline, this can also prove detrimental to the plants and result in them becoming stunted and not performing. Nonetheless, if you elect to plant in this environment, The Plant Company recommends ensuring the soil is well prepared with organic matter such as compost and water regularly during dry periods.
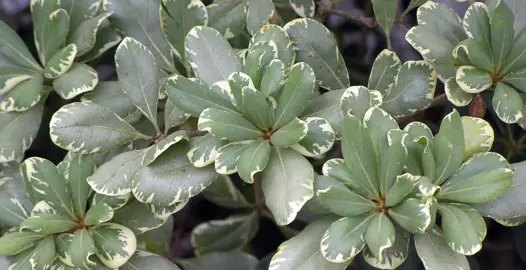
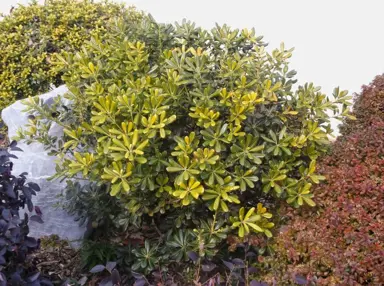
The answer to this question depends on how much shade. In shaded conditions Pittosporums tend to become “stretched” as the branches extend to chase light. The leaves will tend towards a darker green colouring, and flowering diminishes. In full sun they tend to be more compact with better leaf colouring, and great flowering. That said, Pittosporums will grow well with just 4-5 hours of direct sun during the day, or with large amounts of dappled light.
Please note that a Pittosporum hedge that extends under a large tree or through a shaded area will generally differ in the colouring when compared to other areas in full sun.

Pittosporum do not grow well on wet or heavy soils, including clay soils. In such circumstances, they are likely to die a slow death, and to succumb to the root rot disease, Phytophthora. The article, Why Is My Pittosporum Dying? affords more information on this disease. You might find articles, How To Test If My Soil Is Poorly Drained and Fixing Poor Drainage On A Clay Soil useful.

Pittosporums look amazing when grown in pots and managed appropriately. Pittosporum Little Kiwi, Pittosporum Golf Ball, and Pittosporum Silver Ball are commonly used for this purpose.
To grow a Pittosporum in a pot, choose a pot that is no less than twice the size of what the Pittosporum is currently growing in and that has plenty of drainage holes in the bottom. Fill the bottom of the pot to about 1/3 of the way up with potting mix. Do not use soil or compost when growing plants in a container and do not add fertiliser. The Plant Company potting mix has all the nutrients required to sustain the plant for the next 12 months.
Remove the plant from the container it is growing in by either pulling it free or by cutting the bag. We recommend cutting the bag, especially for larger grade plants, to minimise any chance of damaging the roots. Place the plant in the hole without removing any of the growing media or cutting the roots. You can tease them apart if you want but this is not essential. If the roots have been circling the inside of the pot or they look totally root bound, you don’t need to cut them (refer to, Managing Rootbound Plants, for why we don’t cut them). Add more potting mix and firm this around the plant using gentle pressure, then water well. They should be watered twice a week during hot weather and weekly or fortnightly during cooler periods.
The key to having an amazing Pittosporum in a pot is to both keep it fed correctly (see article Best Fertiliser For Pittosporums Grown In A Container) and not to over-water it. Over-watering is the most common reason Pittosporums fail.
Pittosporums are generally regarded being of medium to high vigour. A healthy Pittosporum should more than double in size each year until it reaches maturity if grown in the correct conditions. Be sure to start with strong and healthy plants at the outset as a sickly plant can take a lot of time to recover. This can be particularly important if you are growing a hedge, as poorly plants will likely result in an uneven hedge.
Pittosporum varieties differ in their mature heights. Some will grow to just 30 cm tall and others to 12 m and more! The Plant Company has put a lot of effort into determining how big each plant will grow in an unrestricted growing environment. Far too often we see people planting a garden too densely and then having to spend a lot of time trimming or removing plants later. This is something we want our customers to avoid, and we therefore provide size information so the planning can be right from the start. Be sure to check out our Pittosporum varieties and the detailed information that accompanies both this, and our other plants.
Choose a full sun or partial shade position for your Pittosporum. The hole should be dug to at least 50-75% deeper and wider than the container the plant is currently growing in. The Plant Company recommends incorporating compost or sheep pellets into the soil to provide additional organic material, but this is not essential. Do not put fertiliser in the bottom of the hole, rather spread Native Plant Fertiliser on the soil surface after planting, and preferably do this when the plant is actively growing in spring.
The Plant Company has produced specific articles to help you grow amazing Pittosporums:
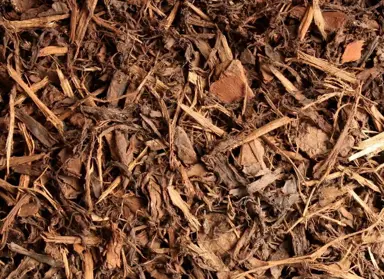
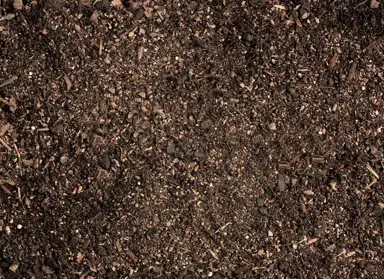
Placing mulch around Pittosporums helps keep the soil moist and significantly reduces weeds. The Plant Company recommends an organic mulch is used as this breaks down over time to provide nutrients and improves the soil. It is also better for the environment than the plastic-based alternatives. Whatever type of mulch is used, it needs to be free draining so the soil can “breathe” and allow water to penetrate quickly and easily. Heavy rates of lawn clippings are therefore not a good option as they hold too much moisture. The Plant Company has three very good options for mulch. The first is coco fibre matting which is made from the husks of coconuts. The second is Earth Mat which is made from recycled paper. Both break down to become part of the soil within two years. The third is black plastic matting which will last 20 years or more. Whichever mulch is used, The Plant Company recommends stones, bark chip, or other similar products be spread over top for aesthetic purposes.
Bark chips or shredded bark makes for an effective mulch provided it is laid thick. A minimum of 6 cm is required to effectively suppress weeds. However, over time this mulch will decompose, so it will need to be topped up every year to continue being effective.
Compost is not considered an effective mulch as weeds germinate easily and it is only short lasting. It is, however, a very good method of adding organic matter to the soil and should be applied before the mulch is put down.
Choose a full sun or partial shade position with good drainage for your Pittosporum. The hole should be dug to at least 50-75% deeper and wider than the container the plant is currently growing in. A planting spade makes the hole digging a lot easier. The Plant Company recommends incorporating compost or sheep pellets into the soil to provide additional organic material, but this is not essential. Do not put fertiliser in the bottom of the hole, rather spread that on the soil surface after planting, and preferably do this when the plant is actively growing in spring.
Remove the plant from the container it is growing in by either pulling it free or by cutting the bag. We recommend cutting the bag or container, especially for larger grade plants, to minimise any chance of damaging the roots. If the roots have been growing in a circle or are all bound up you can tease them apart if you want but this is not essential. Similarly, you don’t need to remove any of the growing media. The Plant Company does not recommend cutting the roots, even if the plant is root-bound as this offers no benefit. This is explained in our article, Managing Rootbound Plants.
Now place the plant in the hole and make sure it is level with the soil surface before filling in around it. If it is above the soil surface, dig more out. If it is below, put in more soil and retest the level. Once the plant is set level with the soil surface, add more soil gradually and firm it around the plant using gentle pressure as you go. Scatter Native Plant Fertiliser across the soil surface after planting and the give the plant a good watering.
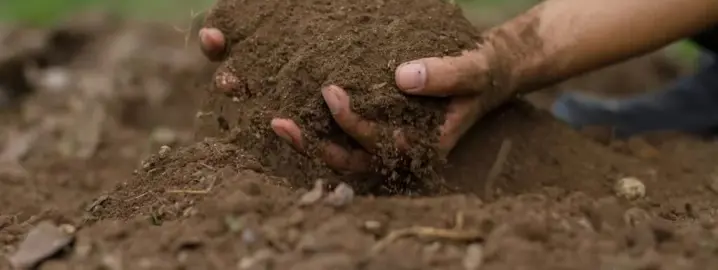
Soils rich in fertility and organic matter that are well-drained will grow amazing Pittosporum plants. The soil should be well prepared with either compost or sheep pellets mixed in at planting or spread on the soil surface after planting. It is important that the soil being planted into won’t restrict root growth and for this reason, clay soils are not well suited to Pittosporums. Clay soils also tend to be very wet which will negatively impact the performance of the plant and can ultimately result in plant death. The Plant Company recommends that poor draining, or clay soils be avoided for Pittosporum.
Feeding your Pittosporum in spring with Native Plant Fertiliser will replenish nutrients and keep them fed for 12 months. Liberal amounts of organic fertiliser can also be used. Do ensure that plants are watered regularly during dry periods to keep them flourishing.
Only potting mix should be used when Pittosporums are grown in a container. Often people will try and cut corners and use soil or mixes that contain both soil and potting mix with poor results. The same applies to when plants are potted up with compost as it holds too much moisture. Soil also contains weeds and tends to become compacted in a container, hence why it is not used in this manner. The Plant Company has nursery grade potting media which is pre-loaded with the correct amounts of fertiliser and micro-nutrients to keep the plant sustained with nutrition and actively growing for the next 12-months. After 12-months, simply add a couple fertiliser tablets to keep the plant fed for the next 12-months.
Pittosporums are best planted any time from mid-autumn until late spring. During this time, they can cope with the stresses associated with planting (root damage mainly) more easily than if they have to also cope with heat and moisture stress as well. They can be planted in summer provided they are well-watered and the roots have plenty of growing media attached when planted. If watering is a challenge, The Plant Company advises planting any time from late-autumn through until early-spring. Make sure you have a good planting spade to make this job a lot easier.
Our article, How To Plant A Pittosporum provides useful advice as do our suite of articles about growing Pittosporums.
A full sun or partial shade position with good drainage and some shelter is essential for getting the best results with Pittosporum. In shaded conditions they tend to become “stretched” and somewhat spindly as the branches extend to chase light. On poorly drained soils they will struggle and may die a slow death due to a lack of air around the roots. The planting position should also be moderately sheltered which will help with establishment and the overall plant shape. The Plant Company recommends staking trees to offer support and to reduce any chance of wind damage.
The Plant Company has produced a suite of articles about growing and looking after Pittosporum to help you get fantastic results.
The correct fertiliser for Pittosporums is important to ensure the plants thrive. The correct fertiliser depends on whether the plant is grown in a pot or in soil, and getting this wrong can be disastrous for your plants. Our articles provide the correct advice on fertiliser so you can achieve the amazing results you are after.
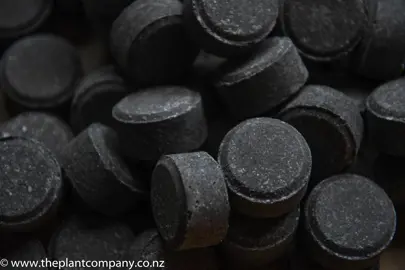
Pittosporums grown in containers require different fertiliser to those grown outdoors in soil. In this instance, the correct fertiliser to use is either container plant fertiliser or fertiliser tablets. Each of these will provide safe, sustained, and complete nutrition to the plant for the next 12-months. Using other types of fertilisers can be detrimental to the plant and may result in plant injury or death.
Foliar feeding using a liquid fertiliser can be undertaken if you have time but this is not essential if container plant fertiliser or fertiliser tablets have been used. If you think the plant needs an extra boost or has some yellowing, however, a liquid fertiliser application won’t hurt. A great benefit of foliar feeding is that it helps keep the leaves strong and lush as the nutrition is right where the plant needs it.
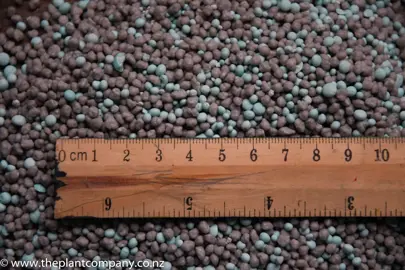
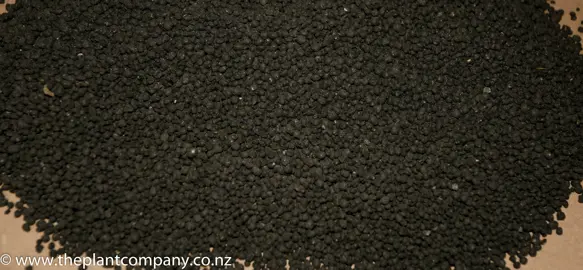
Pittosporums require feeding to keep them growing optimally. The Plant Company’s Native Fertiliser has been blended to give plants the boost they need and then sustained nutrition for the next 12 months. We recommend the fertiliser is applied to the soil surface in spring just as the plants start to grow actively. More importantly, we advise that no fertiliser is placed in the hole at planting, but rather spread around the soil surface so it can wash through the roots as it releases. This fertiliser ensures that nutrients remain in the soil around the plant rather than being lost through the soil profile to where the plant cannot reach it. This also applies to plants grown on sandy soils. The Plant Company’s Native Fertiliser is therefore very environmentally friendly and longer lasting than most other products in the market.
Foliar feeding using a liquid fertiliser can be undertaken if you have time but this is not essential if Native Plant Fertiliser has been applied. If you think the plants need an extra boost or have some yellowing, however, a liquid fertiliser application won’t hurt. A great benefit of foliar feeding is that it helps keep the leaves strong and lush.
Pittosporums are showy plants that do require feeding to keep them looking amazing. A lot of articles have all sorts of advice on this subject which often requires multiple applications, so you use more of their products. The Plant Company prefers to take a simpler and more environmentally responsible approach. We believe the best organic option is The Plant Company’s organic fertiliser which is applied in spring and again in autumn and will keep them well fed. You can safely apply generous amounts of this fertiliser without risk of injuring the plants. More details about this organic fertiliser are provided with the product.
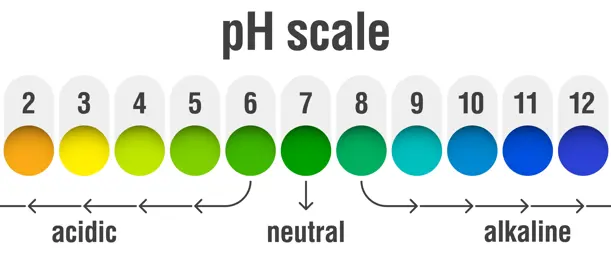
The soil pH refers to how acid of alkaline the soil is. Pittosporums prefer a soil pH within the range of 6.5 to 7.5 which means they can tolerate both slightly acidic and slightly alkaline soils. As the pH of the soil moves away from this optimum range, the nutrients the plant is taking up (or not taking up) through the roots changes. If the shift in pH is too far, this can result in deficiencies of some nutrients and toxic levels of others. In either case this can cause the plant to become sick or even die a slow death.
The best way to know whether the pH is correct for your plant is to do a test. The Plant Company has pH test kits available that are easy to use and only take a few minutes to get a result. Preferably this test should be completed before planting so any pH issues can be corrected without risking the plant. A pH less 5.5 should have sparing amounts of dolomite lime applied along with Native Plant Fertiliser. A pH above 6.8 should have small amounts of soil acidifying fertiliser applied. In both instances the fertiliser should be thoroughly mixed into the soil before planting. A retest of the soil pH should be undertaken after four weeks, and small adjustments made again. If the pH is in the optimum range, just use native plant fertiliser thereafter.
Caring for Pittosporums is about making sure the plants are thriving. Our plant care articles provide the necessary details to give you the greatest chance of success. Afterall, there is nothing worse than putting the effort into planting for them to fail. Therefore, follow our advice and give yourself the best chance of success!
The most important part starts with planting, and our article, How To Plant A Pittosporum, provides sound advice on how to do this properly. So, let’s now assume your plant is growing well and you want to keep it that way!
Winter is the perfect time for mulching around your plants. Organic matter such as compost or sheep pellets should be spread liberally around the plants and then overlaid with mulch. The Plant Company has three very good options for mulch. The first is coco fibre matting which is made from the husks of coconuts. The second is Earth Mat which is made from recycled paper. Both of these break down to become part of the soil within two years. The third is black plastic matting which will last 20 years or more. Whichever mulch is used, The Plant Company recommends stones, bark chip, or other similar products be spread over top for aesthetic purposes. The Plant Company does not recommend adding fertiliser during winter as this is better applied in spring so less is wasted. However, adding organic matter such as compost is quite okay.
Spring is the perfect time for fertilising the plants as they start to bounce into life. The Plant Company has fertilisers which have been specially blended for different plants and in this instance, our Native Plant Fertiliser will give them the correct boost and keep them fed for 12-months. A suitable alternative is our organic fertiliser which will also keep them well fed but they will require a secondary application in autumn.
Summer is when the plants need regular watering, and this should be undertaken every second or third day on the hottest days. Plants that are establishing need particular attention as their root system will not have penetrated deep enough to secure consistent moisture yet.
Caring for Pittosporum in autumn is about keeping the plants healthy. Foliar feeding using a liquid fertiliser can be undertaken during spring, summer, and autumn if you have time but this is not essential if solid fertiliser and/or good amounts of organic matter have already been applied. If you think the plants need an extra boost or have some yellowing, however, a liquid fertiliser won’t hurt.

Caring for a Pittosporum hedge has several key elements to ensure the hedge grows healthily and looks amazing. The most important part starts with planting, and our article, How To Plant A Pittosporum, provides sound advice on how to do this properly. So, let’s now assume your plant is growing well and you want to keep it that way!
There is a wealth of information about Pittosporums and The Plant Company is often asked specific questions which we have laid out in this section.
Pittosporums are native to New Zealand and found pretty much all over the country. The trees and shrubs can grow from 50 cm tall, right up to 30 m tall. They are an important part of many ecosystems where they provide food for birds and other fauna.
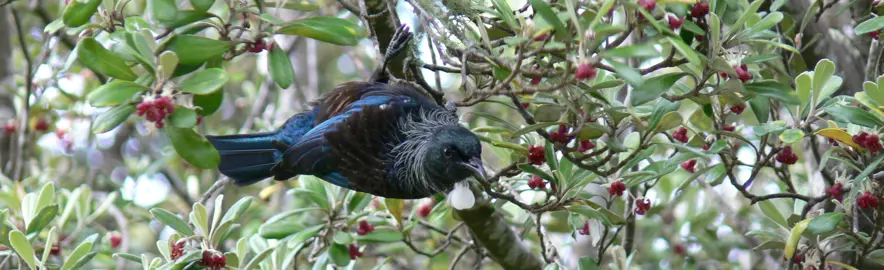
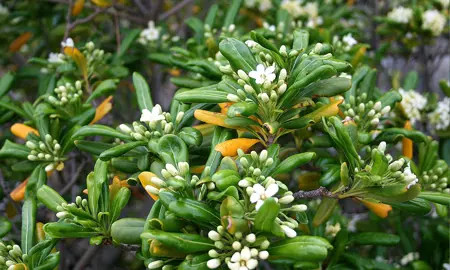
Pittosporums attract a good range of NZ native birds. Karo, Lemonwood, and Pittosporum tobira are particularly important for attracting Tui, Bellbirds, and Kaka. These birds all benefit from Pittosporum flowers and seeds. Bees, bats, and native lizards will also feed on the nectar during flowering.
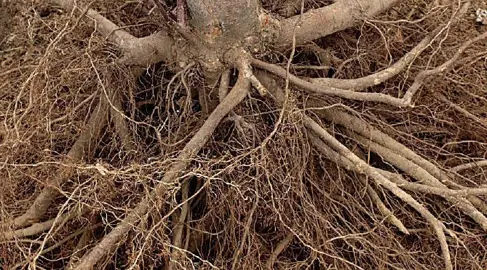
Pittosporum trees do not have invasive roots when compared to other species. However, if you plant it on top of soil drainage lines, the roots are probably going to grow into those lines eventually. If, on the other hand, you’re worried about it lifting concrete, we have not observed this occurring. The Plant Company therefore regards this plant as having non-invasive roots. Rather, the roots tend to shallow and spreading.
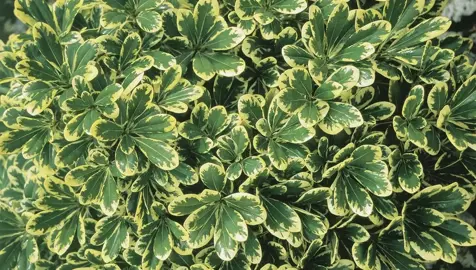
There are many benefits to growing pittosporum in your garden, making them a popular choice for both novice and experienced gardeners alike. Here are some of the key advantages:
Pittosporum flowers and berries provide a valuable food source for birds, bees, and other pollinators. This helps to create a healthy and vibrant ecosystem in your garden.
Overall, pittosporums are a versatile and low-maintenance plant that offers a wide range of benefits for gardeners. With their diverse foliage, fragrant flowers, and ability to provide privacy and screening, they are a valuable addition to any garden.
Pittosporums are generally low-maintenance plants, but there are a few potential cons to consider:

The lifespan of a Pittosporum varies depending on the species and the growing conditions. However, most Pittosporums will live for many decades, with some species living for over 100 years. For example, Pittosporum tenuifolium has a lifespan of 50-100 years, while Pittosporum eugeniodies (Tawapou) has a lifespan of 100-200 years.
The best specimen tree among our Pittosporum varieties is Pittosporum Wrinkled Blue. This variety is popular with landscape designers due to its fantastic form, quick growth, and great aesthetics. It is closely followed by Pittosporum Stephens Island, Pittosporum Mountain Green, and Pittosporum eugeniodies.
Pittosporums do have issues from time to time. Therefore, it is important to understand the underlying issue(s) and have the remedies to fix the problem. The Plant Company have produced this series of articles to help you in the quest for answers to address Pittosporum hedge problems and diseases.
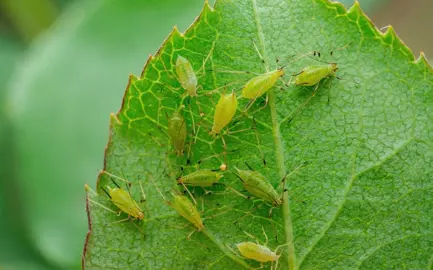
The main pests of Pittosporum are aphids, thrips, and scale insects. Aphids and thrips cause the leaves to both discolour and often have a mottled appearance. Where such pests are present there will often be a black mould on some of the leaves and stems. This is a mould that feeds on the sugars released from the plant by these insects feeding. While the mould is unsightly, it does not hurt the plant and will dissipate with time. All of these pests are easily controlled with a general insecticide. Please always read the label before using any agrichemical.
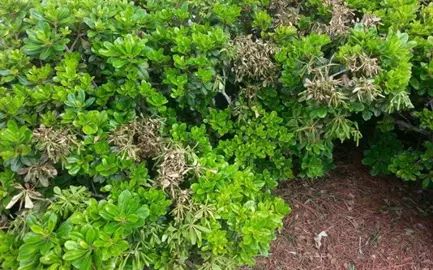
When Pittosporum are grown in wet soils or exposed to prolonged wet through over-watering, the disease, Phytophthora, can take hold. Phytophthora attacks the roots and causes the plant to eventually die. The tell-tale symptoms are yellowing of the leaves, drooping foliage even when the soil is moist, discolouring of the stems, and plant collapse. This can happen over several months during any season and progressively gets worse. This is all resulting from the root system being progressively weakened by the pathogen. Gardeners will often mistakenly think the plant needs more water. Unfortunately, adding water only accelerates the problem prolonged wetness was generally the cause in the first place.
Often the disease will start to show several weeks after a prolonged rain event. It can also occur when plants are regularly over-watered, or planted in soils that are poorly drained or that hold too much moisture (e.g., clay soils). Therefore, good drainage is essential and sites where drainage is poor should be avoided. The article, Fixing Poor Drainage On A Clay Soil gives good advice on how to correct drainage.
Treatment for Phytophthora can be a hit and miss exercise as there are no silver bullets. However, if picked up early, The Plant Company has experienced some success using Transformer. Transformer has fungicidal properties and when used as a soil drench 2-3 times, plants can sometimes recover. However, if the plant is too far gone, The Plant Company recommends removing the plant entirely, and using Transformer as a soil drench before putting in a new plant. Of course, the drainage or watering issues will need to be addressed so the problem does not manifest again.
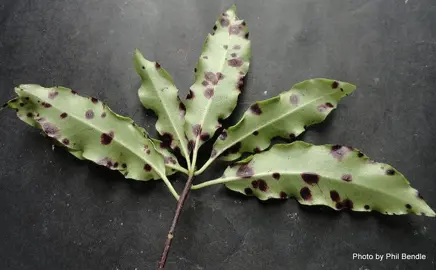
Leaf Spot Fungus on Pittosporum causes small, dark spots on the leaves during cold and wet conditions. The spots can enlarge but generally don’t kill the leaf tissue. They tend to be more unsightly than anything to be concerned about, and usually dissipates once the weather warms. It is easily controlled using a copper fungicide every 10-14 days until the disease is no longer obvious. Please always read the label when using any agrichemical.
Pittosporum eugeniodies and other large-leafed Pittosporums tend to be more susceptible to leaf spotting than the smaller-leafed varieties. The Plant Company takes a conservative approach to managing leaf spotting and accepts that it is only a minor and temporary issue.
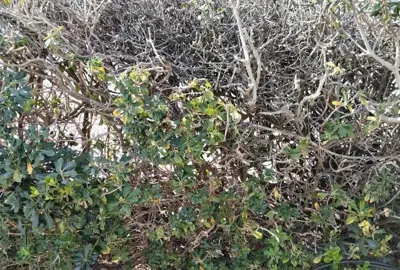
Leaf drop on Pittosporums is usually due to a moisture stress caused by a lack of watering or during an extended dry period. The plant will shed leaves in an effort to reduce moisture losses. Leaf fall can also occur when plants are placed in high levels of shade. For some varieties, however, root rot disease will also induce leaf fall. Root rot is discussed in the article, Root Rot in Pittosporums. You may also find the article, What Is Wrong With My Pittosporum? useful.

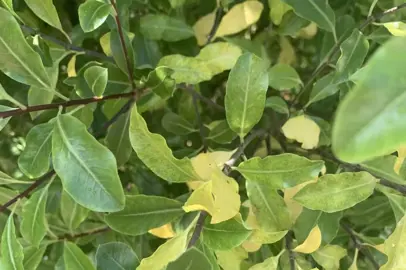
Leaf yellowing in Pittosporum can result from over-watering, being grown in poor draining soil, pests, Phytophthora root rot, or leaf spot disease. Other common causes are too much shade, or the plants have not been fed for a number of years. A liquid fertiliser can be used to correct issues quickly and should be supported with Native Plant Fertiliser during spring if you think this is the cause. On dense bushes the internal leaves will often yellow before being shed. This is due to a lack of light and is normal. Some articles you might find useful are: Root Rot In Pittosporums, Pittosporum Pests, and What Is Wrong With My Pittosporum?
Leaf yellowing in Pittosporum can result from over-watering, being grown in poor draining soil, pests, Phytophthora root rot, or leaf spot disease. Other common causes are too much shade, or the plants have not been fed for a number of years. A liquid fertiliser can be used to correct issues quickly and should be supported with Native Plant Fertiliser during spring if you think this is the cause. On dense bushes the internal leaves will often yellow before being shed. This is due to a lack of light and is normal. Some articles you might find useful are: Root Rot In Pittosporums, Pittosporum Pests, and What Is Wrong With My Pittosporum?
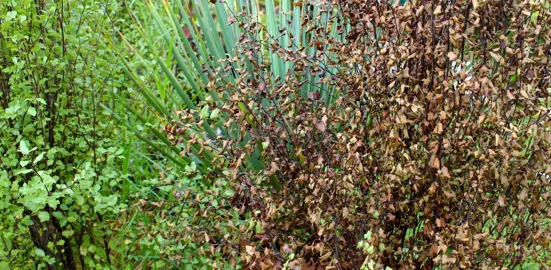
There can be many reasons why a Pittosporum looks sick or is dying and it is often an iterative process to determine why. The most common reasons are presented below and organised from most likely to least likely based on The Plant Company's experience.
The most common cause of death in Pittosporums is due to root rot. When Pittosporums are grown in wet soils or exposed to prolonged wet through over-watering, the disease, Phytophthora, can take hold. Phytophthora attacks the roots and causes the plant to eventually die. The tell-tale symptoms are yellowing of the leaves, drooping foliage even when the soil is moist, discolouring of the stems, and plant collapse. This can happen over several months during any season and progressively gets worse. This is all resulting from the root system being progressively weakened by the pathogen. Gardeners will often mistakenly think the plant needs more water. Unfortunately, adding water only accelerates the problem prolonged wetness was generally the cause in the first place.
There are a host of other reasons that might be causing issues with your plant, and our article, What Is Wrong With My Pittosporum? details other likely causes.
Propagating Pittosporums is a relatively straightforward process when you have the right advice. Cuttings are generally easily rooted, and our articles give you the best chance of doing this successfully and without wasting time.
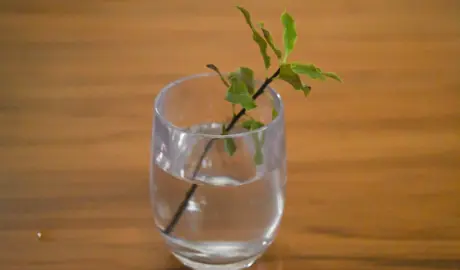
Pittosporums do not root well in just water and are more likely to rot. There might be the odd success, but The Plant Company says, “don’t waste your time!” Our article, How To Propagate Pittosporums will give you a lot better chance of success!
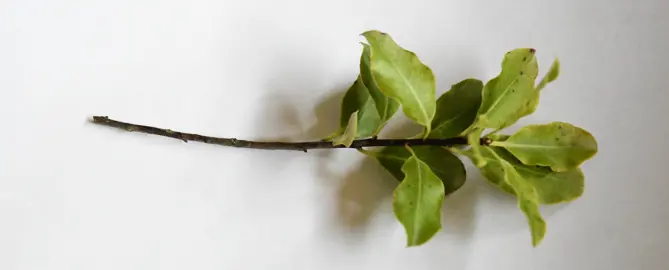
Pittosporums are typically propagated by stem cuttings to keep the variety pure. This is generally undertaken between autumn and mid-spring. A stem about 10 cm long is trimmed into a cutting using secateurs with a couple of leaves left at the top. The leaves are cut in half to reduce transpiration losses and prevent the cutting drying out. The base is cut just below a node, then dipped in rooting hormone. The cutting is then inserted into propagation growing media, and the tray of cuttings is placed under mist. Bottom heat is applied for the first four weeks while the cuttings root. A fungicide is generally applied every week with the cuttings usually ready for potting at week 10.
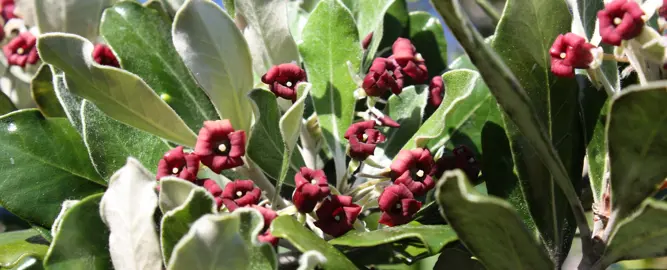
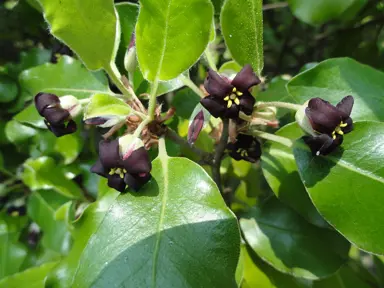
Pittosporum cornifolium , commonly known as Tawhirikaro or Kohuhu, is a native New Zealand shrub prized for its lush foliage, fragrant flowers, and unique characteristics. Some of its key features include:
Preferred Growing Conditions
Uses
Pittosporum cornifolium is a versatile and attractive native shrub that offers beauty, fragrance, and ecological value to gardens and landscapes. Its ease of care and adaptability to diverse conditions make it a popular choice for gardeners seeking a low-maintenance native plant.
The list of Pittosporum that The Plant Company has cataloged, worked on, propagated, and marketed is extensive. Our database of Pittosporum varieties is listed below:
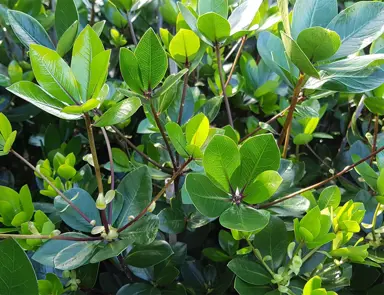
Pittosporum ralphii, also known as Ralph's Kohuhu, is a hardy and adaptable native New Zealand shrub that thrives in various conditions. Here's a closer look at its key characteristics:
Appearance:
Growing Conditions:
Uses:
Overall, Pittosporum ralphii is a versatile and hardy native shrub that offers a combination of visual appeal, adaptability, and ecological benefits. Its ease of care and tolerance of diverse conditions make it a popular choice for gardeners seeking a low-maintenance, native addition to their landscapes.
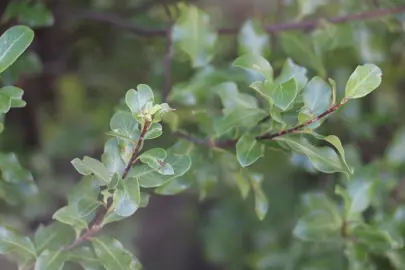
Pittosporum 'Stephens Island', also known as Kohuhu Stephens Island, is a popular and versatile, NZ native shrub. It has several characteristics that make it a desirable choice for home gardens and landscapes.
Appearance:
Growing Conditions:
Uses:
Overall, Pittosporum 'Stephens Island' is a versatile and attractive shrub that offers a variety of benefits for home gardens and landscapes. Its adaptability, low maintenance requirements, and attractive features make it a popular choice for gardeners of all levels.

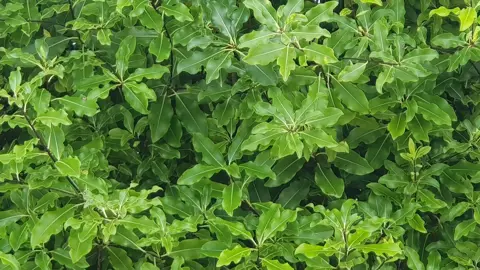
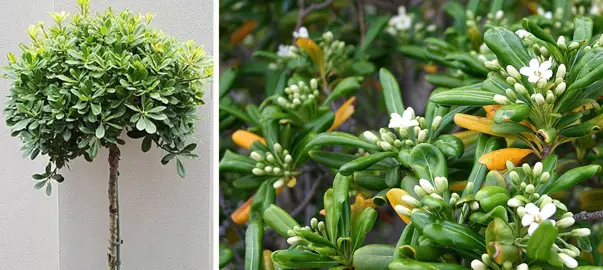
Pittosporum tobira, commonly known as the Japanese or Mock Orange Pittosporum, is a popular plant owing to a few key characteristics:
Pittosporum tobira is perfect for:
Overall, this Pittosporum is a versatile and easy-care plant that is well-suited for a variety of garden styles. Its beautiful foliage, fragrant flowers, and tolerance of different conditions make it a popular choice for gardeners in many parts of the world.
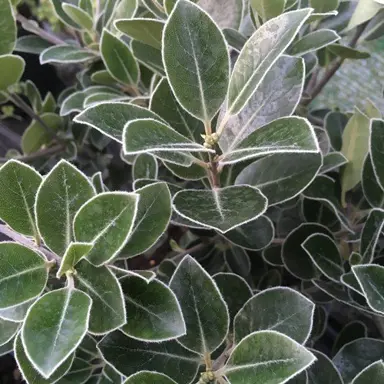
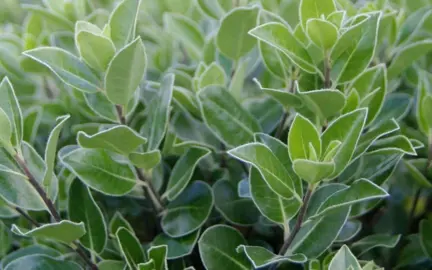
Pittosporum tenuifolium 'Wrinkled Blue', also known as Kohuhu Wrinkled Blue, is a popular cultivar of the Pittosporum due to its attractive foliage, ease of care, and versatility. It certainly is a favourite among gardeners in New Zealand and beyond.
Appearance:
Growing Conditions:
Uses:
Overall, Pittosporum tenuifolium 'Wrinkled Blue' offers a combination of beauty, ease of care, and adaptability. Its unique foliage and compact size make it a popular choice for hedges, screens, and specimen plantings, while its tolerance of diverse conditions makes it suitable for various garden settings.
Pittosporum eugenioides, also known as Lemonwood or Tarata, is a versatile plant with a range of uses, both traditional and modern:
Traditional Uses:
Modern Uses:
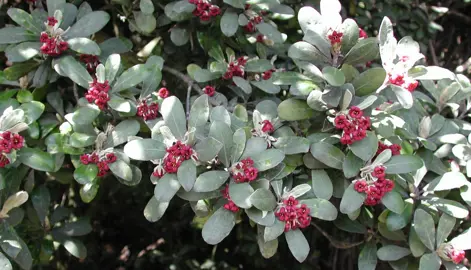
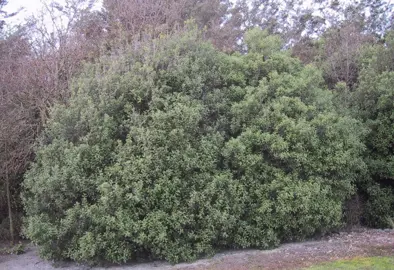
The Plant Company regards Pittosporum crassifolium, otherwise known as Karo, as the hardiest of the Pittosporums. It tolerates a wider range of environmental and soil conditions better than other varieties in our experience. It also has great form, is quick growing, and has great aesthetics. It is closely followed by Pittosporum Stephens Island and Pittosporum tenuifolium.
The Plant Company regards Pittosporum crassifolium, otherwise known as Karo, as the hardiest of the Pittosporums. It tolerates a wider range of environmental and soil conditions better than other varieties in our experience. It also has great form, is quick growing, and has great aesthetics. It is closely followed by Pittosporum Stephens Island and Pittosporum tenuifolium.
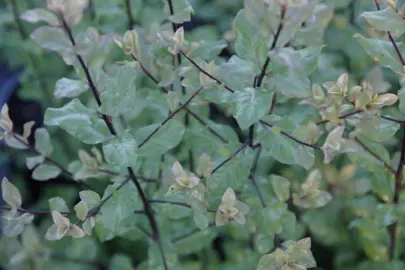
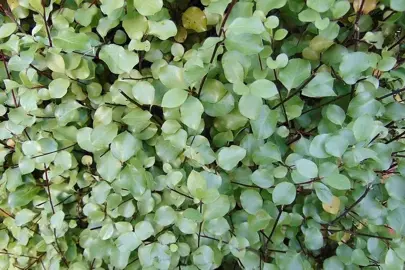
Pittosporum 'Golf Ball', also known as Kohuhu, is a dwarf cultivar of the Pittosporum tenuifolium species and enjoys immense popularity in New Zealand gardens for several reasons:
Compact and versatile
Its rounded, ball-shaped form stays within a manageable 60cm height and spread, making it ideal for various garden settings, including:
Easy care and low maintenance
Year-round appeal
In conclusion, the compact size, low maintenance requirements, year-round appeal, native status, and aesthetic charm make Pittosporum 'Golf Ball' a popular choice for gardeners in New Zealand.
There are several reasons why Pittosporum tenuifolium, commonly known as Kohuhu, is so popular in New Zealand:
Versatility and Adaptability:
Native and Eco-friendly:
Low Maintenance and Aesthetic Appeal:
Overall, Pittosporum tenuifolium offers a combination of practicality, sustainability, and aesthetic appeal, making it a popular choice for gardeners and landscapers across New Zealand.
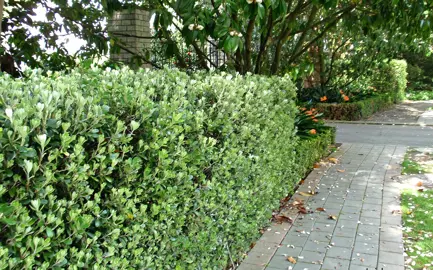
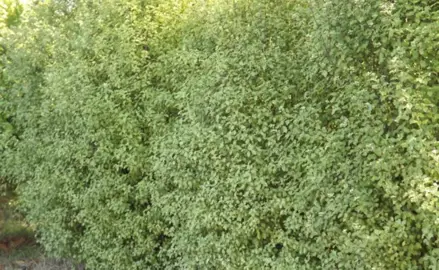
Growing a Pittosporum hedge takes some thought and planning to ensure you get look you are after. Factors such as the plant spacing, desired height, and variety are all important considerations. The Plant Company have produced this series of articles so you can grow a Pittosporum hedge with confidence and success.
Pittosporum Stephens Island is regarded by The Plant Company as the best Pittosporum variety for hedging. The elegant and dense foliage makes it perfect for this hedging 1 m and above. The other popular options include Pittosporum crassifolium, Pittosporum Wrinkled Blue, and Pittosporum tenuifolium.
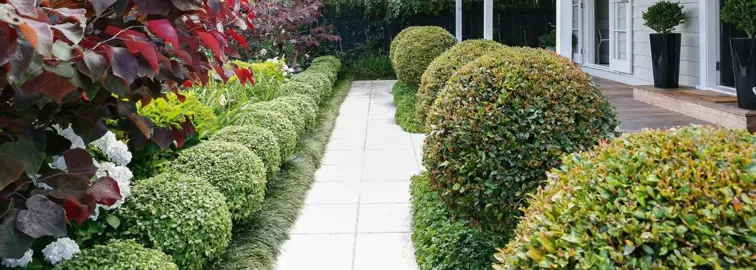
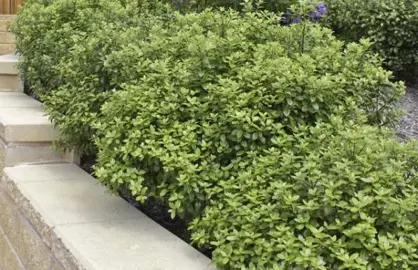
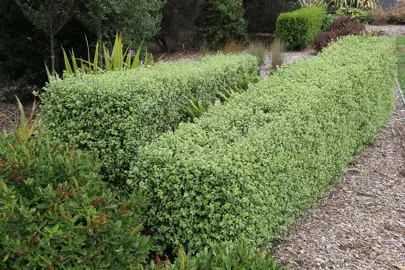
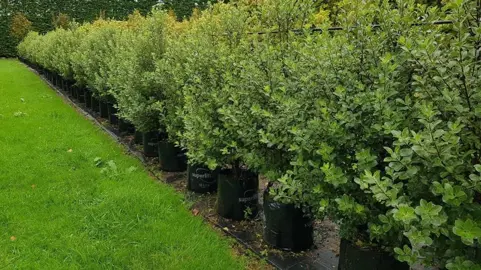
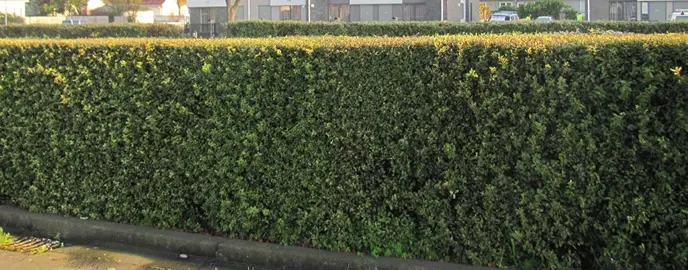
Pittosporums make amazing hedges, both formal (i.e., trimmed), and informal (not trimmed). To create an outstanding hedge The Plant Company recommends spacing them 45 cm apart. The faster you want the hedge to fill in, the closer they should be planted is the general rule. With this planting regime they will close in quickly and also push each other upwards as they compete for light. The result is a fabulous hedge every time.
You can go out to 60 cm if the budget is tight but that will often result in a gap at the bottom between plants which is hard to fill. The gap results from the natural vase shape with which these plants grow. In this situation opt for smaller grade sizes and plant more of them rather than going with bigger plants as this will make the money go further and produce a better result in the longer term.
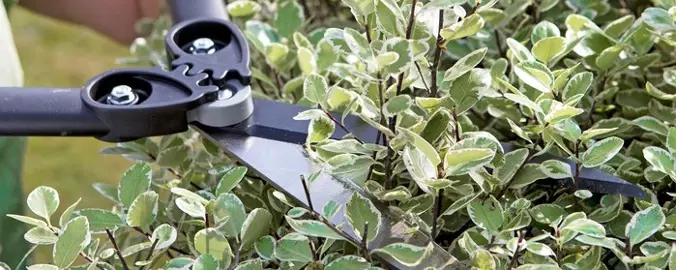
The key to an amazing hedge is to trim them little and often. This helps keep them dense and encourages the fresh, new growth. The best hedges are trimmed 2-3 times per year. The Plant Company has produced articles on trimming Pittosporums, fertiliser for Pittosporums, and Pittosporum troubleshooting to help you grow amazing plants.
Pittosporum make amazing hedges (both formal and informal) and to create an outstanding formal hedge, The Plant Company recommends spacing them 45 cm apart. The faster you want the hedge to fill in, the closer they should be planted is the general rule. With this planting regime they will close in quickly and also push each other upwards as they compete for light. The result is a fabulous hedge every time.
You can go out to 60 cm if the budget is tight but that will often result in a gap at the bottom between plants which is hard to fill. The gap results from the natural vase shape with which these plants grow. In this situation opt for smaller grade sizes and plant more of them rather than going with bigger plants as this will make the money go further and produce a better result in the longer term.
If 25L grades (or bigger) are purchased which are 1m tall and lush, you can space these 1 m apart without issue. These grades have generally been manicured to ensure they are bushy to the base and will therefore branch and fill in more easily.
The perfect spacing for a Karo hedge starts with determining how far apart to space the plants. As a general guide, 60 cm between the plants is the ideal spacing for a Pittosporum crassifolium hedge. If you want the hedge to fill in faster, you can move the spacing to 50 cm. However, going wider than 60 cm will have two impacts on the hedge. The first is that the gap between the plants at the base will be harder to fill in given plants naturally grow upwards. The second is that the Pittosporum plants will tend to grow wider rather than upward. At a closer spacing the plants compete for light with each other, and in doing so, push upwards. The Plant Company therefore recommends a 50-60 cm spacing to achieve an amazing Karo hedge.
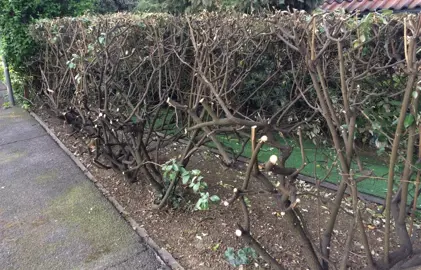
Pittosporum are hit and miss for whether they will sprout when cut right back. As a general rule, aggressive cutting requires the plant to have heathy shoots at the outset and not being older than 3-years old. This activity is best undertaken during spring or summer using secateurs or a pruning saw. Please note: Pittosporum grown in shade environments may struggle to re-establish when cut back severely. Similarly, plants growing sub-optimally due to disease or nutritional issues may also struggle to regrow. The Plant Company does not recommend cutting plants any lower than 15 cm above ground level to ensure a better chance of success with this procedure. We also recommend taking a cautious approach with aggressive cutting.
To create an outstanding Pittosporum hedge The Plant Company recommends spacing them about 45 cm apart, as discussed in our article, How Far Apart Should Pittosporums Be Planted For Hedging?
It is important to understand that the hedge is generally pruned in early spring and late summer with about 10-15% of the exterior vegetation removed. The amount removed depends on how much you need to contain the hedge. The best Pittosporum hedges are trimmed twice per year with a little and often approach to keep the plants dense and lush. That said, they still look fine with once-a-year trimming. See our article, How To Trim A Pittosporum Hedge for finer details on this subject. Further, The Plant Company has produced expert advice on Trimming Pittosporums, Fertiliser For Pittosporums, Pittosporum Troubleshooting, and many more Pittosporum articles to help you grow amazing plants.
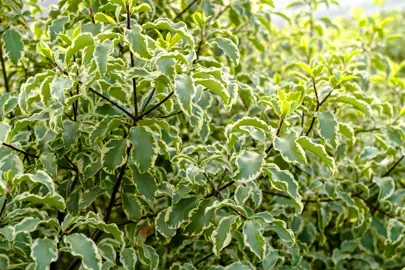
Variety selection is also very important as not all varieties grow as tall as each other. Check out The Plant Company's range of Pittosporum varieties to make sure you get the right one. We have taken great care to provide accurate information and detail about how each one grows. The Pittosporums most commonly used for a formal hedge are Pittosporum Stephens Island, Pittosporum crassifolium, Pittosporum eugeniodies, Pittosporum tenuifolium, and Pittosporum Silver Sheen.

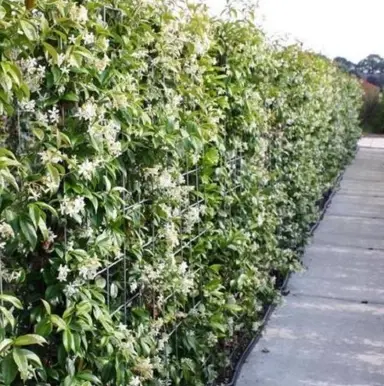
Pittosporums make amazing informal hedges (i.e., minimally trimmed) and to create an outstanding hedge, space plants about 1.5-2 m apart (depending on the variety). The faster you want the hedge to fill in, the closer they should be planted. Variety selection is very important as not all varieties grow as tall and wide as each other. Check out our range of Pittosporum varieties to make sure you get the right one. The Plant Company has taken great care to provide accurate information and detail about how each one grows. The hedge can be trimmed as little or as much as you want given it is the informality you are wanting. The Plant Company normally trims only to shape and contain informal hedges.
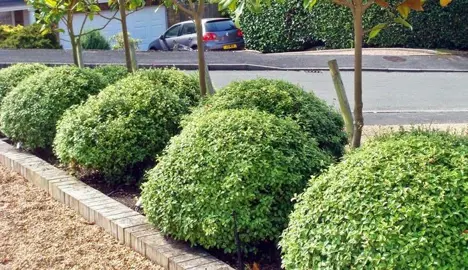
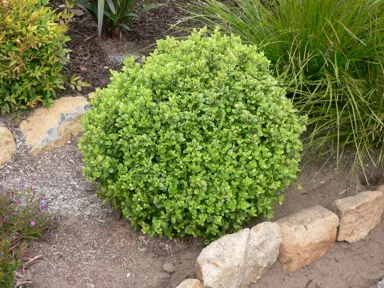
Creating a Pittosporum ball is very easy, but right variety selection is where it begins. Choose a variety such as Pittosporum Little Kiwi, Pittosporum Golf Ball, or Pittosporum Silver Ball. These varieties grow with a low and dense habit, but still need to be clipped to for a tidy ball. The Plant Company will routinely trim the plants lightly to encourage more shoots and a denser plant. All the time, the ball is progressively shaped until the desired size is achieved. This process can take three years (or more) to complete for a large ball. If all this seems too hard or you don’t have the patience, contact us and we can generally supply your needs.
Creating a Pittosporum topiary standard requires both patience and a straight, single-stemmed plant to start off with. The plant is staked to grow with a straight trunk to just past the mid-height of the topiary (i.e., ball). All the side branches are trimmed off to about 10 cm above the mid-point of the topiary. The top of the plant is cut off just above the mid-point of the ball to encourage sprouting just below the cut. As the new stems grow, they are routinely “tipped” (i.e., the top bud is pinched out) to encourage more shoots. All the time, the ball is progressively shaped until the desired size is achieved. This process can take three years (or more) to complete. If all this seems too hard or you don’t have the patience, contact us and we can generally supply your needs.

Trimming a Pittosporum hedge so it looks perfect is quite easily achieved with some attention to detail. It does, however, start at establishment if you want a truly awesome hedge.
As the hedge is establishing, keep trimming the outer branches lightly. Removing the tips of the branches during this process encourages more branching and a denser hedge overall. It is essential while doing these light trimmings to keep in mind what width you want the hedge to be when fully grown. Given about 5-10 cm of growth will be removed at each trimming when it is fully grown, the light trimming needs to occur inside the maximum width of the hedge by about 15 cm. Only when the hedge thickens should it be taken out to its maximum width.
Trimming typically occurs in early spring and again in late summer with a little and often philosophy. Taking off too much will make the hedge look bare, but it will grow back. To get straight lines better than trimming by eye, you can use a string line after the initial cut is complete. When The Plant Company trims hedges, we will often do a light cut over, then stand back and look along the lines to determine the high points for removal. Good luck!
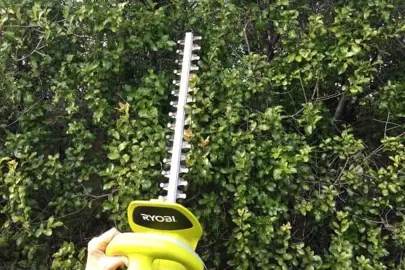
Pittosporums are trimmed to remove excess foliage and to shape the plant(s). This is best done during early spring, late summer, or both. You can be as gentle or aggressive as you like when trimming. A mistake often made is to trim the plants hard enough. This error generally results in a woodier plant and a much larger plant that can be difficult to contain. Pittosporum are very forgiving plants, and even if you get the trimming wrong, they will usually recover!
The Plant Company recommends trimming frequently (at least one per year) and cutting the plants back no further than where you can see leaves. If you remove all the foliage, the plant will need to sprout again from those stems to regrow and this can be quite unsightly. The Plant Company also recommends removing any dead or unsightly stems at this time.
The articles, How To Grow A Pittosporum Hedge, How To Trim A Pittosporum Hedge, and How Hard Can I Trim A Pittosporum?, provide further information.
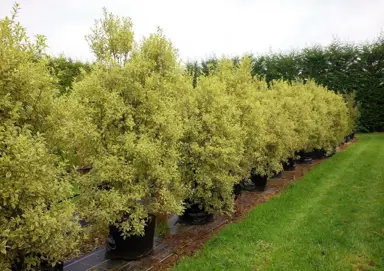
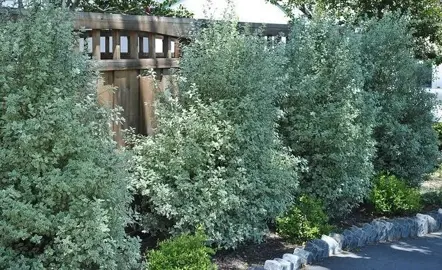
Choosing the best Pittosporum for screening in NZ depends on a few factors like your desired growth rate, mature size, foliage colour, and specific site conditions and these can all be explored within our range of Pittosporum varieties. In the interim, here are some popular options:
Pittosporum tenuifolium:
Pittosporum eugeniodies (Tawapou):
Pittosporum can be trimmed at any time of the year, though early spring and late summer to early autumn are the times recommended by The Plant Company. At these times the plants will produce good amounts of fresh, new growth. Moreover, the growth in autumn will not be at risk from frost injury. Light trimming to remove unsightly foliage can occur at any time of year.
The best time to prune Pittosporum tenuifolium depends on whether you are growing it as a hedge or as a specimen plant. Hedges can be pruned (trimmed) up to three times per year in spring, summer, and autumn, particularly if you are wanting a premium hedge. However, they are generally trimmed in spring and mid-autumn. Specimen plants are pruned annually to maintain an evenly shaped tree. This is also undertaken in spring and can be followed up in summer and autumn also. The key to a dense and well-formed Pittosporum is trimming little and often which helps create and maintain a dense and even appearance.
Watering Pittosporums correctly is an important part of growing amazing plants. Importantly, making sure they get enough without being over-watered is paramount.

Pittosporums are not tolerant of drought. They can handle short periods of dry, but they do require consistent soil moisture to survive. If they are to dry out, plants will wilt, and defoliation and leaf browning happening soon after. The Plant Company’s experience with this situation is that plants are unlikely to recover when re-watered in severe cases.
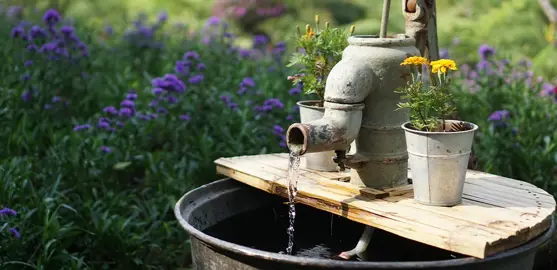
Pittosporums require good levels of soil moisture to stay fresh and keep growing actively. They require watering both during establishment and during dry periods. The Plant Company recommends a generous watering every third day during summer, or every third day if the soil is a bit heavier. If plants start to wilt, you need to water immediately. The Plant Company advises watering in the morning or in the evening for water conservation purposes.
If your Pittosporum is being grown in a pot, watering every second day during summer and once every week during winter is the general rule. This will depend on how hot the growing environment is and the size of the plant of course. A word of caution, over-watering is the most common cause of plant death with Pittosporum.
Whether you need assistance finding the plant you’re looking for or you simply want to know more about who we are and what we do, we invite you to get in touch with us today. A member of The Plant Company team will get back in touch as soon as possible.

Join our community of happy customers.