Choosing Your Callistemon
The choice of Bottlebrush really depends on the specific use:
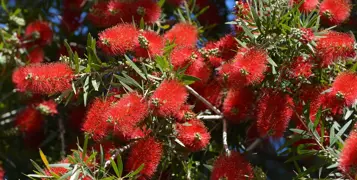
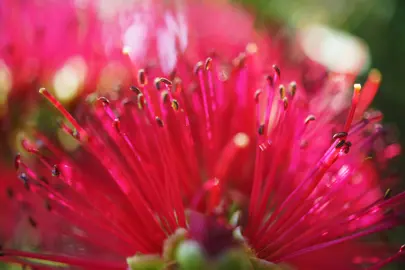
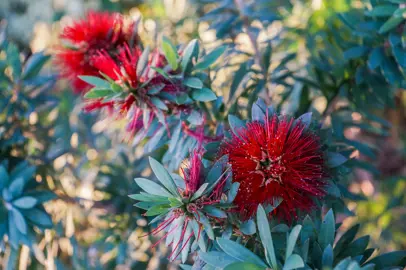
You’ve definitely seen them around. Those incredible, brush-shaped flowers in fiery reds and vibrant pinks that bring a splash of classic Kiwi summer to gardens all over New Zealand. They belong to the Bottlebrush plant (or Callistemon, if you want to use its proper name), and the great news is they are surprisingly simple to grow yourself.
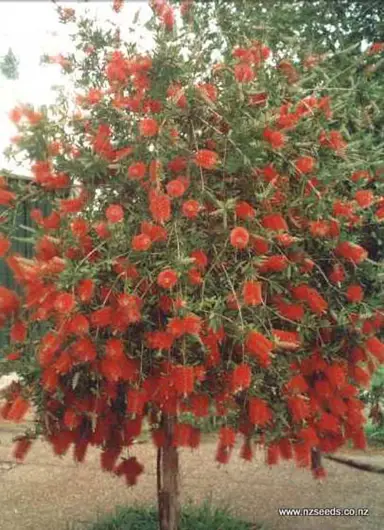
The sheer number of different Callistemon varieties in NZ can feel overwhelming. The secret is knowing that plant experts have bred special varieties for nearly every situation. Choosing the right one from the start is the most important step to getting a plant that thrives without needing constant attention. The key is to match the plant to your space and climate, not just the flower colour.
The choice of Bottlebrush really depends on the specific use:
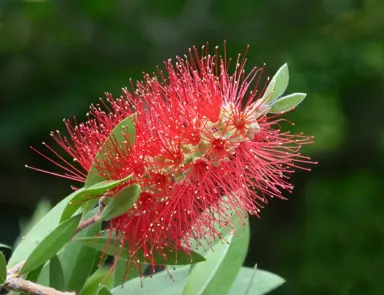
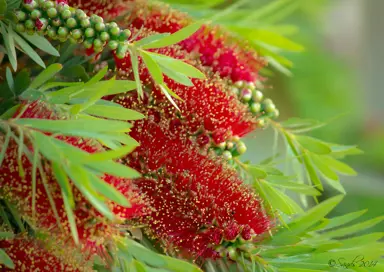
Thinking about size and your local climate first ensures you'll get a spectacular display year after year. Once you’ve picked the perfect shape, you can have fun choosing between the classic reds, stunning pinks, or even creamy whites.
The first step is to pick its new home. Callistemon thrive in full sun, so choose the sunniest spot you have available. Once you've found the perfect place, dig a hole that’s about twice as wide as the pot it came in, but no deeper. This gives the roots plenty of loosened soil to spread out into as they get established in your garden.
Before you plant, it's worth checking your soil's drainage. Bottlebrush plants are tough, but they hate having “wet feet,” which can cause their roots to rot. Here’s a simple test: fill your newly dug hole with water and see how long it takes to drain away. If the water is gone within an hour or so, your soil has great drainage. If it takes much longer, you need to address the drainage issue or consider planting it on a small mound.
Gently ease the plant from its container and place it in the hole. That packed block of soil and roots you’re holding is called the root ball. Look closely and make sure the top of this root ball sits perfectly level with, or even a tiny bit higher than, the surrounding ground. Planting it too deep is a common mistake that can cause the stem to rot, so aim for it to sit at the exact same depth it was in its pot.
With your plant sitting at the correct height, fill the hole back in with the original soil, firming it gently around the root ball to remove any large air pockets. To finish, give your new Callistemon a really deep watering right at its base. This isn't just to give it a drink; it helps settle the soil snugly around the roots. Finally, scatter shrub fertiliser across the soil surface.
That deep watering you gave your plant is a great start, but how do you keep that precious moisture from evaporating? The single best thing you can do now is add a layer of mulch. Think of it as a protective blanket for the soil. A 5cm layer of bark chips, pea straw, or even compost spread around the base of the plant will lock in moisture and stop weeds from competing with your new bottlebrush. Just be sure to keep the mulch from touching the main stem to prevent any rot.
Your plant will now enter its establishment period. To help it along, your main job is consistent watering. Through its first summer, a deep watering once a week is the perfect routine. This simple step is the most important part of early Callistemon care in NZ, setting the plant up for a long and healthy life.
During this crucial first year, it’s best to resist the urge to do too much. Avoid any major pruning or feeding. Right now, the plant needs to build a solid foundation of roots, not produce a flush of new leaves. Once it's well-established, your Callistemon will become the tough, drought-tolerant plant it’s famous for. After it has settled in and completed its first big flowering season, then you can start thinking about how to prune it for the perfect shape.
After your bottlebrush has put on its first spectacular flowering show, you might notice it starting to look a bit sparse, with long woody stems and leaves just at the tips. Gardeners often call this getting ‘leggy’, and it’s a completely normal habit for a Callistemon. The good news is that a simple annual haircut is all it takes to keep your plant dense, bushy, and looking its best.
The single most important rule for Callistemon pruning in NZ is timing. Unlike many other garden shrubs, you should not prune them in winter. The best time is immediately after the plant has finished flowering. This is because bottlebrushes produce next year’s flowers on the new growth that appears in summer and autumn. Prune too late, and you’ll be cutting off all your future blooms.
Getting the cut right is easy. Take a pair of secateurs and look for the spent flower heads, which will have faded and turned brown. Follow the stem down from the old flower and make your cut just behind it, into the fresh, leafy growth. This simple trim is called ‘deadheading’, and it’s the key to encouraging the plant to branch out. For a larger plant or a Callistemon hedge, you can use the same principle with shears, trimming the whole plant back lightly just after flowering finishes.
By deadheading your bottlebrush, you’re sending a clear signal to the plant: “Stop making seeds and put your energy into growing new, bushy stems instead!” This not only prevents the leggy look but also dramatically increases the number of flowers you’ll get next season. Now that you’ve told the plant where to grow, the next step is to give it the right fuel to do it.
Giving your bottlebrush the right fuel after its trim is simple, but it comes with one very important rule. Because Callistemon are native to Australia's ancient, nutrient-poor soils, they have completely different dietary needs than most other plants in your garden. For this reason, you must always choose a fertiliser specifically designed for native plants.
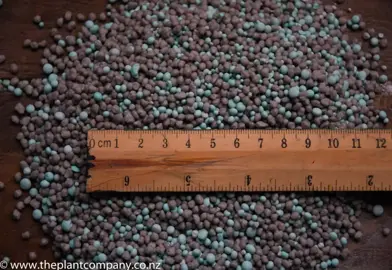
The Plant Company’s shrub fertiliser is ideal for bottlebrushes. It contains all the nutrients to sustain the plant for 12-months without over-doing it to cause plant injury. A small handful around each plant in spring is all that is required.
Even the toughest plants can have an off day. If your bottlebrush is looking a bit sad, it's usually one of three common issues that are very easy to fix.
1. The Leaves are Turning Yellow First, check the soil. If it’s constantly soggy, your plant has "wet feet" and the roots are struggling to breathe. Improve drainage by adding compost to the surrounding soil. If the soil is fine, think back to your fertiliser. Yellowing leaves are a classic sign of phosphorus burn from using the wrong type of plant food. Stick strictly to native-specific fertiliser.
2. There Are No Flowers! A bottlebrush without its brushes is a frustrating sight. Before you panic, run through this quick checklist. Is it getting:
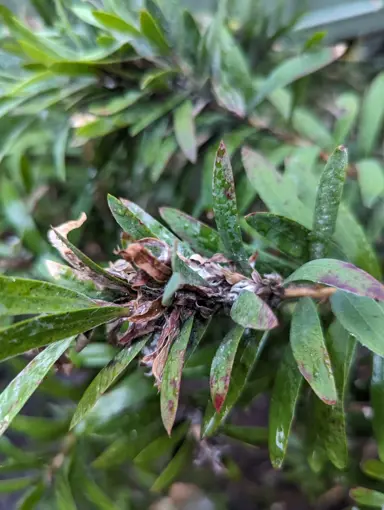
3. There's Weird Stuff on the Leaves If you see a black, dusty coating, that's sooty mould. It’s not a disease itself but grows on the sugary waste left by tiny sap-sucking insects. A spray with conqueror oil will get rid of the insects, and the mould will eventually wash away.
Growing a magnificent bottlebrush isn't about complicated techniques; it’s about knowing the right, easy actions for each season. With this straightforward approach, you can grow one with complete confidence.
To make it foolproof, here is your entire annual plan:
With just a few moments of easy care each season, you're rewarded with a stunning display and a garden buzzing with native birds. You no longer just see a plant; you see a beautiful, low-effort addition to your home. Your garden is about to get a whole lot brighter.
Whether you need assistance finding the plant you’re looking for or you simply want to know more about who we are and what we do, we invite you to get in touch with us today. A member of The Plant Company team will get back in touch as soon as possible.

Join our community of happy customers.